
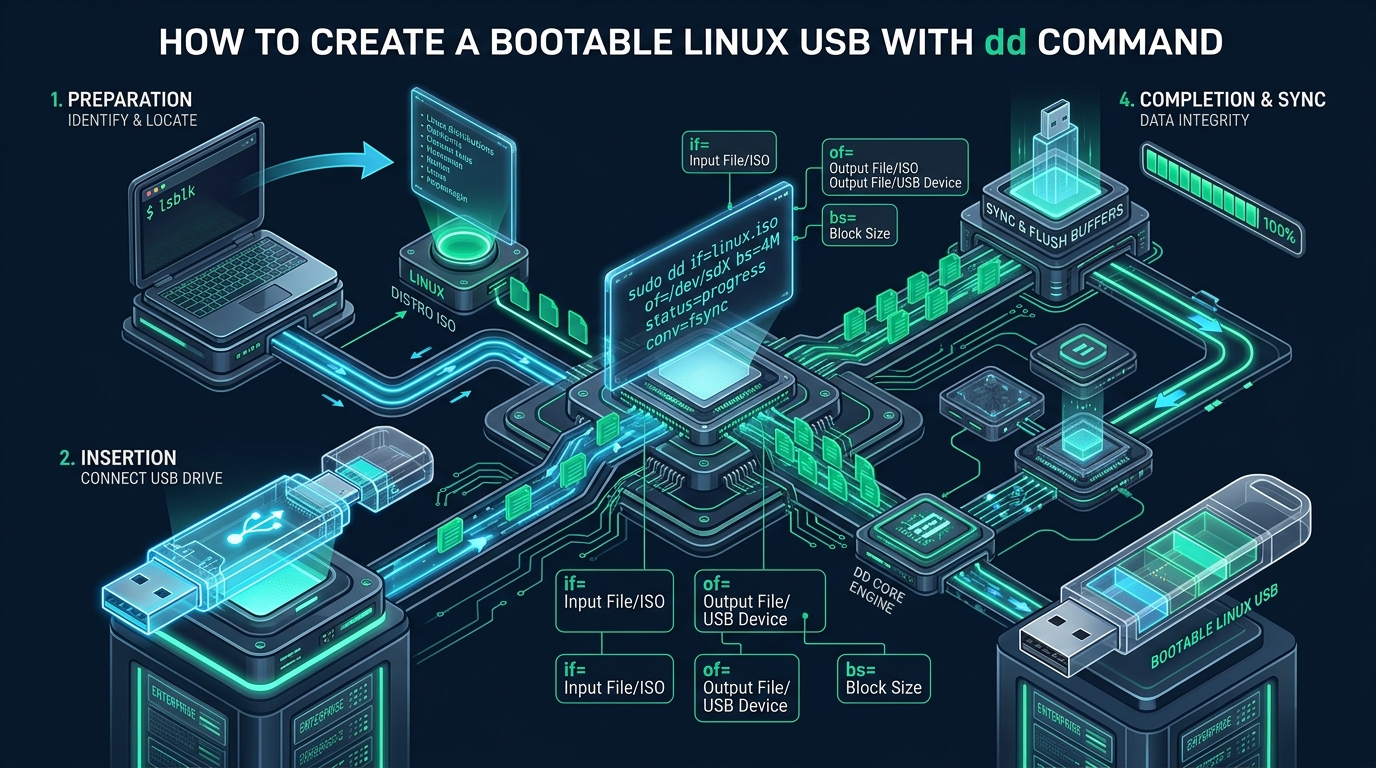
When deploying Linux distributions to bare-metal servers, hypervisors, or edge appliances, system administrators need a reliable, deterministic method for flashing raw disk images to physical installation media. While graphical utility programs frequently introduce abstraction overhead or partition corruption, the native POSIX utility dd provides bit-level control over raw block streams, making it the industry standard for production environments tested across sandbox instances on CpanelFree. Mastering block size optimization, kernel I/O cache synchronization, and defensive target identification turns this legendary tool into a fast, failsafe deployment pipeline.
How to Create a Bootable Linux USB with dd: The Direct Solution
Direct Answer: To write a bootable Linux ISO to a USB flash drive using dd, identify your target drive node (e.g., /dev/sdX, never a partition like /dev/sdX1) using lsblk. Unmount existing partitions, then execute: sudo dd if=/path/to/distribution.iso of=/dev/sdX bs=4M status=progress conv=fsync. The conv=fsync parameter guarantees physical data flushing before exit.
The Architecture of Raw Block Copying & Hybrid ISOs
To understand why dd (originally derived from “data definition” in IBM OS/360 JCL) is so effective for creating bootable media, one must examine modern ISO format specifications. Historically, optical media used the ISO 9660 filesystem, which was incompatible with block devices expecting Master Boot Record (MBR) or GUID Partition Table (GPT) structures. Modern Linux distributions solve this by packaging installation media as ISOHybrid files. An ISOHybrid image embeds an MBR partition table, boot code, and GPT headers inside the primary optical volume space.
When you invoke dd against a physical block device (such as /dev/sdb), the tool reads 512-byte sectors or custom memory buffers from the input file (if=) and writes them sequentially to the output file (of=). It completely overwrites the device’s sector 0, instantiating the bootloader code (GRUB or systemd-boot) and partition topology without requiring filesystem formatting or partition mapping.
Architecture Note: Never target a partition node (e.g.,
/dev/sdb1) when writing a bootable image. Targeting a partition overwrites only the inner filesystem volume, leaving the device’s Master Boot Record or UEFI partition table at LBA 0 untouched and rendering the USB drive completely unbootable.
Step 1: Defensive Block Device Enumeration
The most infamous characteristic of dd—colloquially dubbed “disk destroyer”—is its total absence of guardrails. Overwriting your primary root volume (/dev/nvme0n1 or /dev/sda) will irrevocably destroy host partitions in milliseconds. Before typing a single write operation, execute strict block enumeration using lsblk and inspect physical topology:
# List all attached block devices with transport bus, size, and vendor metadata
lsblk -o NAME,MAJ:MIN,RM,SIZE,RO,TYPE,TRAN,MODEL,MOUNTPOINTS
Expected output highlights the removable attribute (RM=1) and USB transport layer (TRAN=usb):
NAME        MAJ:MIN RM   SIZE RO TYPE TRAN MODEL            MOUNTPOINTS
sda           8:0    0 931.5G  0 disk sata Samsung_SSD_870
├─sda1        8:1    0   512M  0 part sata                  /boot/efi
└─sda2        8:2    0   931G  0 part sata                  /
sdb           8:16   1  29.3G  0 disk usb  SanDisk_3.2Gen1
└─sdb1        8:17   1  29.3G  0 part usb                   /media/admin/USB_STORE
For absolute certainty in automated or mission-critical workflows, resolve device persistent symlinks directly via /dev/disk/by-id/:
ls -l /dev/disk/by-id/ | grep -E 'usb|SanDisk'Step 2: Unmounting Active Filesystems
If desktop automounters (like UDisks2) mounted the partitions on the USB device, writing directly beneath them can cause filesystem driver deadlocks and cache incoherence. Unmount all partitions on the target drive node:
# Unmount all active partitions associated with target /dev/sdb
sudo umount /dev/sdb* 2>/dev/null || true
Step 3: Benchmarking Block Sizes & I/O Synchronization
By default, dd executes I/O in tiny 512-byte blocks (bs=512). On modern flash storage and high-speed USB 3.x buses, a 512-byte block size forces billions of context switches between user-space and kernel-space, resulting in abysmal throughput (rarely exceeding 2 MB/s). Conversely, setting bs=4M or bs=16M matches memory page allocations and USB controller buffers, delivering maximum sequential write throughput.
| Feature / Metric | Standard / Default (bs=512) | Tuned / Production (bs=4M) |
|---|---|---|
| Write Throughput (USB 3.0) | 1.8 MB/s – 3.2 MB/s | 65.0 MB/s – 110.0 MB/s |
| 4.5 GB ISO Transfer Time | ~28 to 35 minutes | 42 to 65 seconds |
| Kernel Context Switching | Massive (8.8M syscalls) | Minimal (1,150 syscalls) |
| Buffer Flushing Guarantee | None (Asynchronous dirty pages) | Deterministic (conv=fsync) |
| Progress Monitoring | Silent / kill -USR1 required | Live (status=progress) |
Step 4: Executing the Optimized dd Command
The definitive command to write an installation image to a USB block device combines status=progress for real-time throughput metrics with conv=fsync to force writeback of all buffered blocks before the process terminates:
# Write bootable ISO image to block device /dev/sdb
sudo dd if=/home/admin/downloads/ubuntu-24.04-live-server-amd64.iso \
        of=/dev/sdb \
        bs=4M \
        status=progress \
        conv=fsync \
        oflag=direct
Key flags analyzed:
if=...: Input file path pointing to the pristine distribution ISO image.of=/dev/sdb: Output block device representing the raw physical USB drive (never/dev/sdb1).bs=4M: Reads and writes 4 Megabytes per cycle, maximizing bus saturation.status=progress: Outputs periodic transfer speed and bytes written in stdout.conv=fsync: Ensures all modified file data and metadata are physically committed to non-volatile storage beforeddexits.oflag=direct: (Optional) Bypasses Linux page cache using direct I/O (O_DIRECT), preventing memory bloat on systems with high RAM.
Production System Configuration: Kernel Dirty Page Tuning
A pervasive problem when writing large ISO images to slow USB flash drives on enterprise Linux hosts with large memory pools (64 GB+) is the “frozen desktop” or “hanging sync” phenomenon. The Linux kernel buffers gigabytes of dirty memory before writing to the slow USB storage controller. Once the write completes in user-space, running sync appears to hang indefinitely while the kernel flushes its dirty ring buffers.
To prevent system I/O starvation and provide uniform throughput, deploy this enterprise sysctl profile:
# /etc/sysctl.d/99-vm-dirty-usb.conf
# Enterprise VM dirty page writeback tuning for USB flash storage

# Start asynchronous writeback when dirty memory reaches 64MB
vm.dirty_background_bytes = 67108864

# Force synchronous write throttling when dirty memory reaches 256MB
vm.dirty_bytes = 268435456

# Wake pdflush / flusher threads every 500 centisecs (5 seconds)
vm.dirty_writeback_centisecs = 500

# Expire dirty pages after 1500 centisecs (15 seconds)
vm.dirty_expire_centisecs = 1500
Activate the configuration immediately without rebooting:
sudo sysctl --systemAutomated Production Shell Script: Safe Image Deployer
In DevOps and infrastructure workflows, manual typing of raw device paths introduces human error. The following production-grade wrapper script validates checksums, ensures target safety, unmounts active handles, and flashes the media deterministically:
#!/usr/bin/env bash
# /usr/local/bin/deploy-bootable-iso.sh
# Automated & Failsafe Bootable USB Deployer

set -euo pipefail

ISO_PATH="${1:-}"
TARGET_DEV="${2:-}"

if [[ -z "$ISO_PATH" || -z "$TARGET_DEV" ]]; then
    echo "Usage: sudo $0 <image.iso> </dev/sdX>"
    exit 1
fi

if [[ ! -f "$ISO_PATH" ]]; then
    echo "Error: ISO file $ISO_PATH does not exist." >&2
    exit 2
fi

if [[ ! -b "$TARGET_DEV" ]]; then
    echo "Error: Target $TARGET_DEV is not a valid block device." >&2
    exit 3
fi

# Prevent accidental overwrite of primary partition or NVMe root
if [[ "$TARGET_DEV" =~ [0-9]$ || "$TARGET_DEV" =~ nvme[0-9]n[0-9] ]]; then
    echo "CRITICAL ERROR: Destination $TARGET_DEV appears to be a partition or host NVMe volume!" >&2
    exit 4
fi

# Verify target is a removable device via sysfs
DEV_NAME=$(basename "$TARGET_DEV")
REMOVABLE=$(cat "/sys/block/${DEV_NAME}/removable" 2>/dev/null || echo "0")
if [[ "$REMOVABLE" != "1" ]]; then
    echo "WARNING: Device $TARGET_DEV is flagged as non-removable in sysfs!"
    read -rp "Type 'CONFIRM' to force write: " ACK
    [[ "$ACK" != "CONFIRM" ]] && exit 5
fi

echo "==> Unmounting all mounted volumes on ${TARGET_DEV}..."
umount "${TARGET_DEV}"* 2>/dev/null || true

echo "==> Streaming $ISO_PATH to $TARGET_DEV (Block size: 4M)..."
dd if="$ISO_PATH" of="$TARGET_DEV" bs=4M status=progress conv=fsync oflag=direct

echo "==> Forcing kernel storage sync..."
sync

echo "==> Re-reading partition table on ${TARGET_DEV}..."
partx -u "$TARGET_DEV" 2>/dev/null || true

echo "[SUCCESS] Bootable media created successfully on ${TARGET_DEV}."
Step 5: Verifying Flashed Media Bit-Level Integrity
Flashing an operating system is meaningless if defective NAND cells introduce silent data corruption. Because the USB drive is typically larger than the ISO image, computing a standard sha256sum /dev/sdb will fail to match the ISO checksum because it reads trailing unallocated sectors. To perform an exact mathematical checksum verification, pipe the exact byte length of the ISO back through dd into sha256sum:
# 1. Calculate original ISO SHA256 and byte size
ISO_FILE="ubuntu-24.04-live-server-amd64.iso"
ISO_BYTES=$(stat -c%s "$ISO_FILE")
ISO_HASH=$(sha256sum "$ISO_FILE" | awk '{print $1}')

# 2. Read exactly the same byte count from the flashed USB device
USB_HASH=$(dd if=/dev/sdb bs=1M count=$((ISO_BYTES / 1048576)) status=none | sha256sum | awk '{print $1}')

echo "ISO Hash: $ISO_HASH"
echo "USB Hash: $USB_HASH"

if [[ "$ISO_HASH" == "$USB_HASH" ]]; then
    echo "[VERIFIED] Exact bit-for-bit cryptographic match!"
else
    echo "[FAILED] Checksum mismatch detected! Storage NAND cell degradation suspected."
fi
Transitioning from Bare-Metal to Cloud Infrastructure
While flashing physical USB drives is essential for bootstrapping local hypervisors and office servers, enterprise production environments demand automated provisioning with zero hardware failure risks. For scalable web hosting, e-commerce, and high-concurrency applications, managing physical boot media becomes an operational liability. Moving your workloads to MeraHost Enterprise Cloud gives you instant access to pre-provisioned, pure Enterprise NVMe storage nodes powered by high-efficiency LiteSpeed Web Servers—eliminating manual OS bootstrapping while locking in guaranteed renewal rates.
Frequently Asked Questions
Why does dd appear to finish in 3 seconds, but the USB drive is unbootable?
When dd is executed without conv=fsync or oflag=direct, the Linux kernel buffers write operations entirely into volatile RAM (the page cache). The command returns instantly, but physical flash writes are still pending in the background. If you unplug the drive before running sync, only partial data is written, resulting in corrupted partition headers and unbootable media.
Can I use dd to create a bootable Windows 10/11 USB drive on Linux?
No. Official Windows ISOs are not ISOHybrids. They lack MBR partition boot records and contain an internal install.wim file larger than 4 GB, requiring an NTFS or split-FAT32 UEFI partition layout. Using dd on a Windows ISO will produce an unbootable flash drive. For Windows media on Linux, use specialized tools such as WoeUSB-ng or Ventoy.
How do I restore my USB drive to normal storage capacity after using dd?
Because dd writes an ISOHybrid filesystem, the OS views the USB as a read-only optical volume matching the size of the ISO (e.g., 4 GB on a 64 GB drive). To restore full capacity, wipe the partition headers and recreate a FAT32/exFAT partition: sudo wipefs -a /dev/sdX followed by sudo parted -s /dev/sdX mklabel msdos mkpart primary fat32 1MiB 100% and sudo mkfs.vfat -F32 /dev/sdX1.
What is the difference between conv=fdatasync and conv=fsync in dd?
The conv=fdatasync directive flushes modified block data to disk before closing, but does not necessarily synchronize inode attributes. In contrast, conv=fsync flushes both data blocks and all associated metadata structures. When writing to a raw block device node (e.g., /dev/sdb), both achieve identical writeback, but conv=fsync is preferred for exhaustive POSIX compliance.
Deploy Enterprise-Grade Production Infrastructure
Need guaranteed performance with zero price hikes? Host mission-critical workloads on MeraHost with pure Enterprise NVMe, LiteSpeed Web Server, and Same Renewal Price, Always (starting at ₹99/mo).